
Digitally Sign an Office of the Federal Register Document
![]()
![]()
| Version Number | Date | Change Description |
|---|---|---|
| 1.1 | 08/17/2022 | Update remove P7M and PKCS7 Signing Tool references. |
| 1.0 | 01/05/2018 | Initial Draft. |
This guide will walk you through the procedures for digitally signing a Microsoft Word document for submission to the Office of the Federal Register (OFR) using your PIV credential or similar digital certificate.
The digital signatory of a document MUST be the same person whose name is typed in the signature block. The names must match exactly or meet the accepted standards listed in the DDH, Ch. 1. To verify the name as applied to the digital certificate, follow the instructions below in the View Signature Certificate in MS Word section.
Using the native Microsoft (MS) Word signing capability applies your Public Key Infrastructure (PKI) certificate to the document, guaranteeing the authenticity of the signer and the document. Once applied, your document is protected and cannot be edited without removing the digital signature. The MS Word signing process saves the signed document under the same filename!
Use MS Word 2010 or later. Only submit “.docx” file types. Older versions of MS Word have no standard method to validate digital signatures. The old file type “.doc” is not compatible with OFR’s digital validation process and is not accepted in the web portal.
Do NOT open a document for digital signature directly from an email. Save the document to your computer first. Then, use the document file saved on your computer for signing purposes.
Do NOT use the Insert Signature function (under the INSERT tab in the Word ribbon). Follow the instructions below to sign the document invisibly as this is the format OFR will accept.
Add Invisible Digital Signatures in MS Word
IMPORTANT: The following instructions apply to MS Word 2013. The signing process for other MS Word versions (e.g., 2010, 2016, Office 365) may vary somewhat. If you have trouble with the signing process, contact your IT support.
- Open the MS Word document on your computer in Word. Save any changes before signing.
- If you have a purchased PKI credential installed on your computer, proceed to Step 3. Otherwise, insert your federal government-issued Personal Identity Verification (PIV) card into your card reader.
- Click the File tab.
- Click Info.
- Click Protect Document.
- Click Add a Digital Signature.
- In the Sign dialog box:
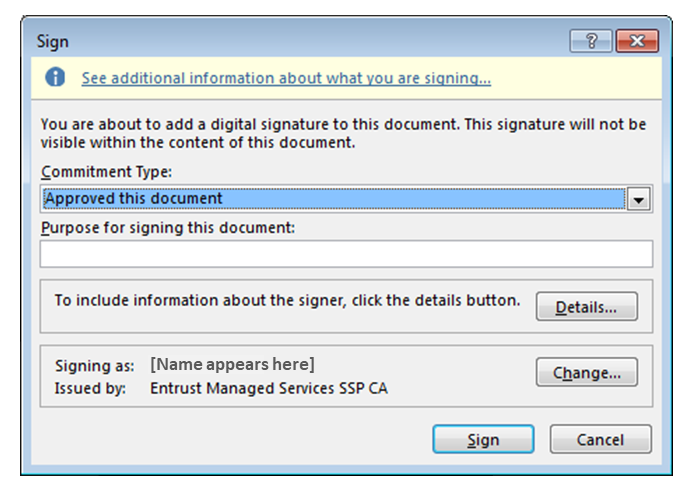
- Select a Commitment Type from the pull-down menu.
- In the Purpose for signing this document, type the purpose or leave blank.
- To ensure the correct certificate is used, click the Change button.
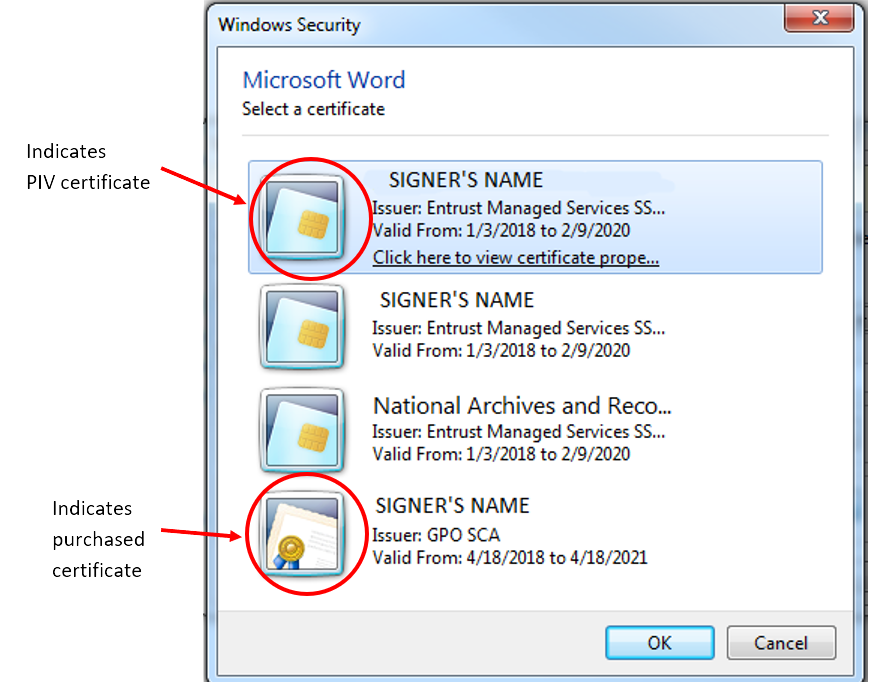
- In the Certification Selection box, there may be multiple certificates. Select the first unexpired certificate with your name. Then click the Click here to view the certificate properties link.
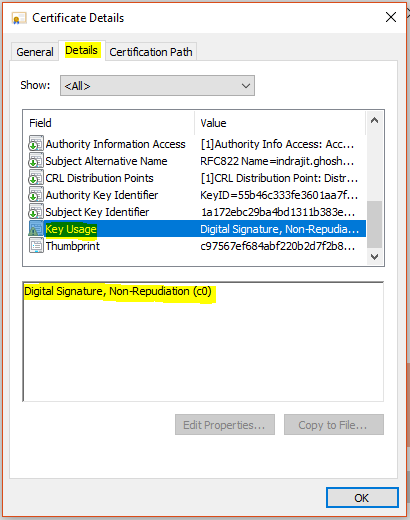
- The Certificate Details box appears. Go to the Details tab and scroll down to Key Usage. Single-click on it. The lower text box should now display “Digital Signature, Non-Repudiation” (for PIV card certificate) or “Digital Signature” (for a purchased certificate). If it does, then this is the right certificate. Click OK to close the window and proceed with signing.
- If this is the wrong certificate, click OK. Then select another certificate and repeat these steps until you find the correct certificate.
- Click Sign.
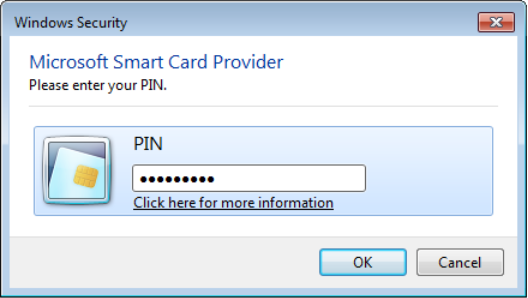
- Follow the prompt to enter your PIN; then click OK.
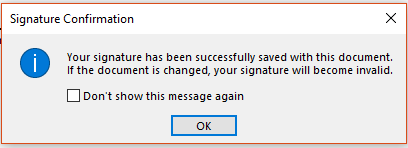
- If the digital signature certificate and PIN are valid, the document is signed and automatically saved under the same filename! This is the file you submit to OFR via the web portal.
If you are signing multiple documents, leave MS Word open and your PIV card inserted to sign without having to re-enter your PIN for each file.
For multiple-signatory documents (e.g., dual-agency submissions), the first signer forwards the signed document to the next signer, who repeats the signing process on the already-signed file. See the Multiple Digital Signatories in MS Word section below. All digital signatories must have their names and titles typed into a separate signature block in the signature block area of the document.
A digital signature can be removed if necessary. This feature might be handy if last-minute changes are needed or if a different signatory is desired. Remember that the document will have to be re-signed prior to submission to OFR. See Remove Invisible Digital Signatures in MS Word below.
Multiple Digital Signatories in MS Word
Multi-agency digital submissions are not only possible but also recommended. Exactly like paper-and-disk submissions, if multiple agencies are submitting a document for publication, OFR receives only one document, signed by all agencies. For example, if six agencies are jointly issuing a rule, OFR does NOT get six submissions of the same rule. Regardless of the method of submission, the legal requirements are the same; i.e., representatives from all issuing agencies must sign the document (DDH, 1.6). If one or more of the agencies are unable or unwilling to digitally sign, the document must be submitted via the conventional paper-and-disk procedure (DDH).
One of the issuing agencies should serve as the primary or lead coordinating agency. Follow these steps for jointly issued, digitally signed documents:
- Save the finalized version of the document as an MS Word file (.docx). Be sure that the digital signatories’ names and job titles are pre-inserted in the signature block area of the document.
- Coordinate among the issuing agencies and establish the sequence of signing; i.e., who signs first and forwards the signed file on for the next signature. Determine which agency will actually submit the signed file to OFR via the web portal once all signatures are complete.
- The representative from the first agency digitally signs the file using the same method as a single-agency submission. See Add Invisible Digital Signatures in MS Word above. All signers must ensure that their names and job titles are pre-inserted in the signature block area of the document.
- Email that signed file to the next agency for digital signature.
- The representative from the next agency in sequence downloads the signed file from the email onto their computer and ensures that their name and job title are pre-inserted in the signature block area of the document. The representative then digitally signs the already-signed file. No changes can be made to the signed file without removing the existing signature(s). If changes are required to the MS Word document, the whole process starts anew with the corrected, unsigned Word document.
- If there are more issuing agencies, repeat Steps 4 and 5 until all agencies have digitally signed.
- Once all agency signatures have been applied to the file, the file is sent to the agency that will submit it to OFR via the web portal. From OFR’s perspective, it doesn’t matter who submits the file; OFR is concerned with validating the digital signatories.
- The sending agency should include a special handling letter alerting OFR of the multi-agency submission with several signatories. Be sure the special handling letter is digitally signed as well. One signer is sufficient for the special handling letter.
- The sending agency logs into the web portal, uploads the signed MS Word file and special handling letter, and submits.
- The signatures are validated in the web portal. OFR also will check all digital signatories against their printed signature block in the document. The names must match exactly or meet the accepted standards listed in the DDH. (See Step 1.)
Remove Invisible Digital Signatures in MS Word
- Open the MS Word document that contains the invisible signature you want to remove.
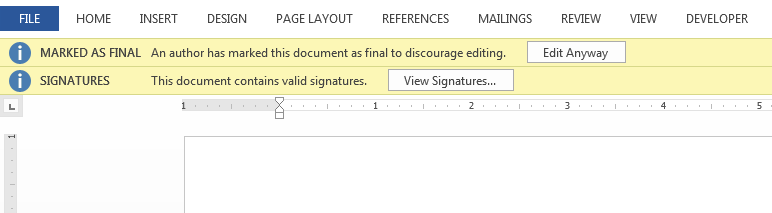
- In the header, you may see the option to View Signatures. Click that button and proceed to Step 5. Otherwise:
- Click the File tab.
- Click Info.
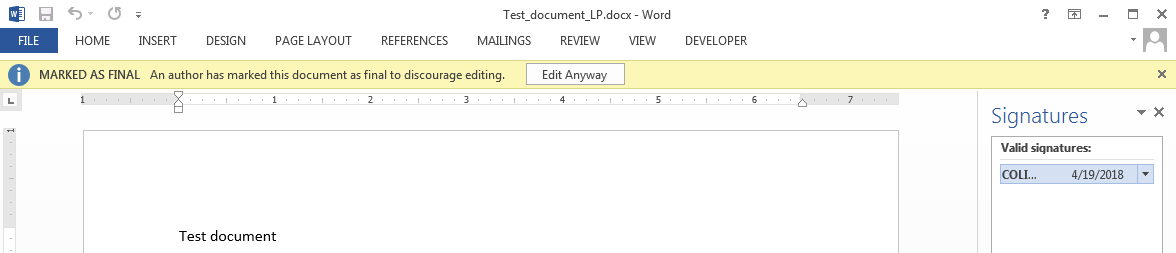
- Click View Signatures. The Signatures pane appears.
- Next to the signature name, click the arrow.
- Click Remove Signature.
- Click Yes.
View Signature Certificate in MS Word
You can check the details of the digital certificate(s) used to sign an MS Word document (e.g., the name assigned to the certificate or expiration date).
Open the signed MS Word document containing the certificate(s) you want to check, or have the signer sign a document via the instructions provided in the Add Invisible Digital Signatures in MS Word section above.
- In the header, you may see the option to View Signatures.
- Click View Signatures in the header or click Info > View Signatures in the Word ribbon. The Signatures pane appears.
- In the Signatures pane, hover on the name of the signer you want to check; then click the small down arrow.
- Click on Signature Details.
- The signer’s name as applied to the certificate is listed, along with the Certification Authority (CA). Click the View button.
- A pop-up window appears. Be sure that the General tab is selected. The valid dates of the certificate are listed. More technical details, such as the certification path and key usage values, are shown under other tabs.
FAQs
We’ve been using the free GSA Digital Signing Tool to sign documents. Do we need to change?
You should adopt the MS Word signing procedures sooner rather than later. The GSA Digital Signing Tool is no longer supported and may malfunction.
What files does the portal accept?
The portal accepts signed MS Word files with the “.docx” extension.
What special software do we need to buy and install to make this work?
None. As a federal agency, you should already have MS Office 2010 or later installed. Simply follow the provided instructions to digitally sign your documents.
Do you accept any MS Word file?
No. Your file must be saved as an XML-based MS Word document (“.docx”). If you’re using MS Word 2010 or later, this is generally the default setting. Otherwise, when you save the file, choose “Word Document” (.docx) in the “Save as type” pull-down.
We save everything as a “.doc” file and/or we’re still using MS Word 2007 (or earlier). What are our options?
Paper-and-disk submission. Don’t forget the CD and the signed certification letter!
All we need is MS Word 2010 or later?
Yes, that and your signing credential, either the one on your PIV card or the one your agency purchased that is currently installed on your computer.
We purchased our signing certificates from a PKI vendor. We use them to sign, which creates the “p7m” file. What do we do now?
If you are using purchased certificates, such as from a trusted PKI vendor, you can continue to use them. Instead of being on a PIV card, your certificate is installed on your computer. Follow the Add Invisible Digital Signatures in MS Word instructions above to sign your MS Word file.
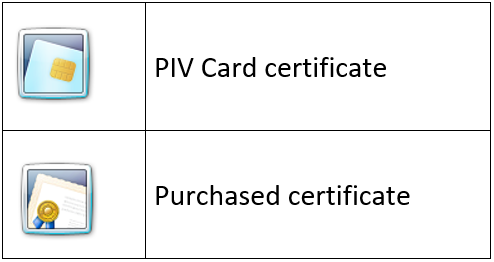
How do I identify the Purchased Certificates and PIV Card Certificates when signing a document?
When checking for the correct certificate, as detailed in Step 7 of the Add Invisible Digital Signatures in MS Word instructions above, note the different icons for the PIV and purchased certificates:
Some of our signers use MS Word for Apple on iPad. Will this work for PKI submission?
Microsoft has not put that function (PKI-based digital signature) into the MS Word for Mac (Office for Mac) software. We recognize that some agencies have signers who use the Mac platform. We expect to run testing when this function becomes available.
I already have a web portal submission account. Do I need to update it or reapply?
No.