
Sign and Encrypt Emails in Microsoft Outlook
Personal Identity Verification (PIV) cards contain digital certificates that can help users send secure email. In general, “secure email” refers to digitally signed and/or encrypted emails. Digitally signed emails give us confidence that the individual who claimed to send a message actually did (non-repudiation) and that the message was not modified while in transit (integrity). Encrypted emails prevent the message from being read by unintended recipients (confidentiality).
The following guide walks you through configuring Outlook to leverage the digital signature and key management certificates found on your PIV to enable secure email. By default, Outlook will only allow sign and encrypt emails when the configured email address on the client is same email address as encoded on the PIV card.
Configure Outlook to Send Secure Email
Know your Email Provider Capabilities
Although several email client applications have options to support digital signatures or encryption (S/MIME), not all email providers organically support S/MIME with third party PKI certificates. S/MIME support often times varies with different tiers of service. Coordinate with your email and workstation administrators to ensure S/MIME capabilities are available on both email servers and user workstations, especially if accessed through a browser.
The following steps pertain to Microsoft Outlook 2016, and may also be applicable to newer versions up through Outlook 2021. These steps may not be applicable to cloud email users, but you may find additional configurations below for both Exchange Online and O365 in Other Helpful References.
- Insert your PIV card in your computer’s smart card reader.
- Browse to File > Options > Trust Center > Trust Center Settings… and select Email Security.
- Click Settings… beneath the Encrypted Email heading.
- Click New to create a new security preference.
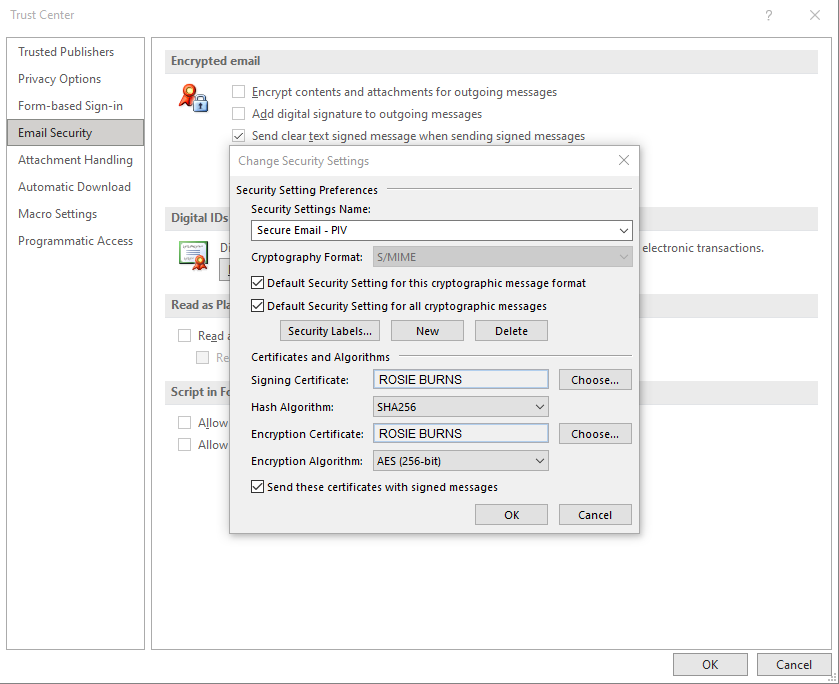
- Assign a Security Settings Name (for example, “Secure Email - PIV”).
- Click Choose next to Signing Certificate.
- Select your PIV card’s digital signature certificate and click OK.
- Select SHA256 as the Hash Algorithm.
- Click Choose next to Encryption Certificate.
- Select your PIV card’s digital signature certificate and click OK.
- Select AES (256-bit) as the Encryption Algorithm.
- Enable the Send these certificates with signed messages selection box.
- Click OK three times.
Note: The following screenshot shows an example of a completed security preference configuration.
Publish Your Certificates to the Global Address List
The Global Address List (GAL) is a shared, enterprise-wide contact list in Microsoft Active Directory. Publishing your certificates to the GAL will add your encryption certificate and associated public key to an enterprise address book, making it easier for other internal agency users to send you an encrypted email.
- Insert your PIV card in your computer’s smart card reader.
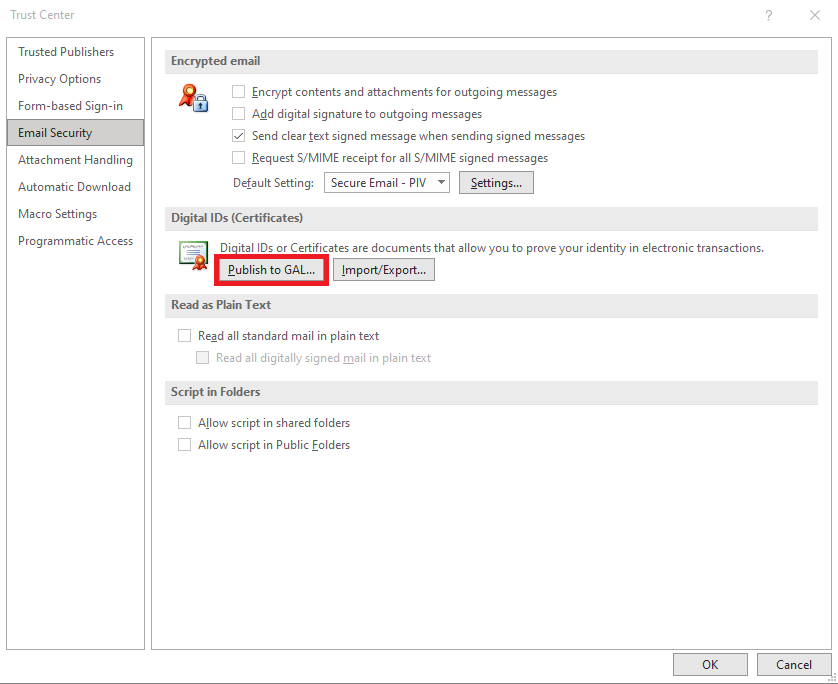
- Browse to File > Options > Trust Center > Trust Center Settings and select Email Security.
- Click Publish to GAL… beneath the Digital IDs (Certificates) heading.
- Click OK when warned about Outlook publishing your default security certificates to the Global Address List.
- Enter your PIV card PIN when prompted.
- Click OK twice.
Note: The following screenshot shows the location of the Publish to GAL… button.
Send a Signed Email
- Compose an email.
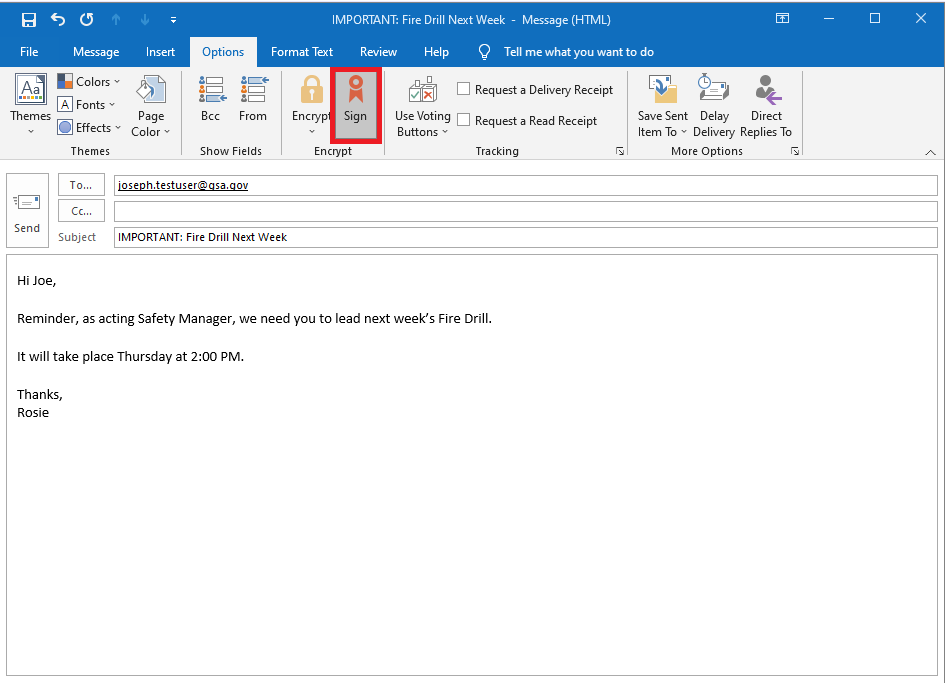
- Click the Options tab.
- Enable the Sign icon (appears as a red ribbon icon).
- Click Send.
- Enter your PIV card PIN when prompted.
Note: The following screenshot shows a signed email.
Send an Encrypted Email
- Compose an email.
- Click the Options tab.
- Enable the Encrypt icon (appears as a yellow lock icon).
- Click Send.
Note: It is common practice to sign a message when encrypting it below.

Manually Import a User’s Encryption Certificate
When sending an encrypted email, the message is encrypted using the public key in the intended recipient’s certificate. If Outlook cannot find the intended recipient’s public key through the Global Address List, you may need to load it manually.
- Obtain a copy of the intended recipient’s Key Management certificate (you may need to ask the intended recipient to export and share their certificate with you)
- Click the Home tab.
- Click the Address Book.
- Select File > New Entry.
- Select New Contact and then click OK.
- Populate the recipient’s contact information, minimally including name and email address.
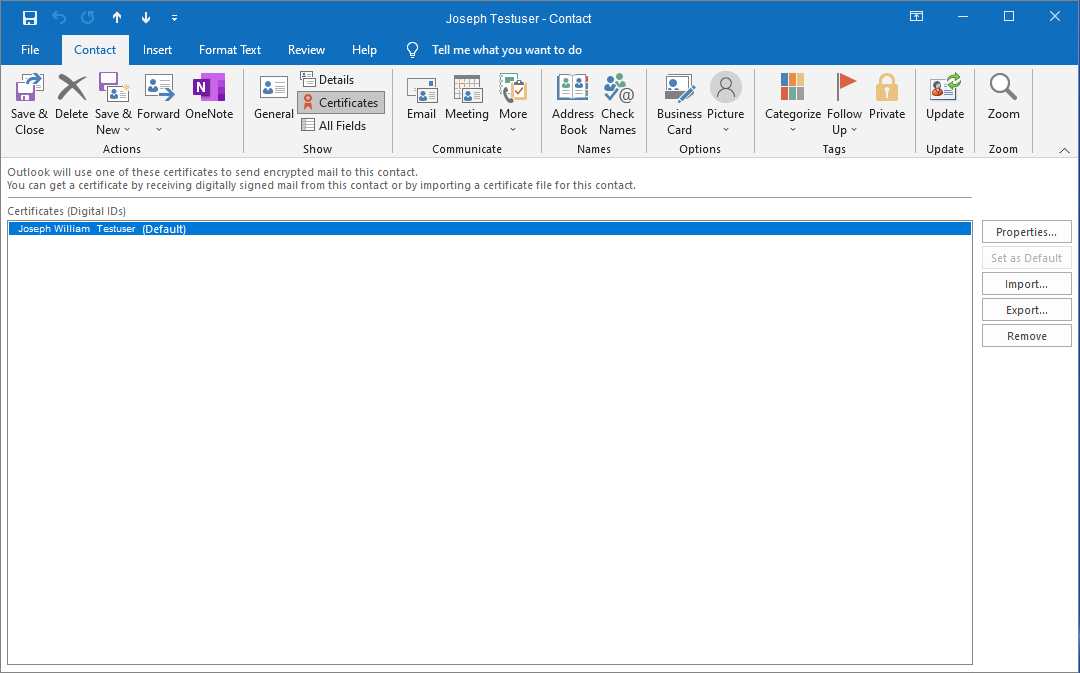
- Click the Certificates icon.
- Click Import and browse to the intended recipient’s encryption certificate.
- Click Save & Close and then follow the steps to send an encrypted email.
Note: The following screenshot shows a certificate loaded into a contact entry.
Decrypt an Email
PIV users may receive and store encrypted emails throughout their tenure in an organization. These emails may have been encrypted with various public key management keys are now retired or replaced. Many PIV card issuers provide historical key management keys when they issue a PIV card, but others may not. Outlook, via the Cryptographic Application Programming Interface (CAPI), can decrypt these emails if the associated private keys are available. The following steps outline how to decrypt an email when the private decryption keys are available via CAPI:
- Select an encrypted email
- Enter your PIV card PIN or private key password when prompted
Note: Your organization may not recover previously issued encryption keys onto your PIV. Instead, it may maintain a separate key recovery service. Please reach out to your local IT department to determine if you can recover retired key management keys.
Other Helpful References
- Enabling S/MIME on Mac Mail
- Enabling S/MIME on Thurderbird email client
- S/MIME with Gmail
- S/MIME with O365
- S/MIME with Exchange Online